Nothing feels better than having smooth skin. However, getting our skin to be smooth requires deciding how to do it – and that decision isn’t always easy. Waxing is a popular option as it lasts a long time and does not need to be repeated often (a maximum of twice monthly for most people). Unfortunately, waxing tends to get expensive and many people do not know how to do it at home. I know, because I used to be in the same boat. Yet, after following some tips from my friends and looking online, I discovered an easy way to do my waxing in the comfort of my own home and now I want to share my procedure with you. By following this super simple 8 step guide, you will be able to safely do your own waxing at home and save money while getting the same results as if you had gone to a professional.
Contents
- What you will need:
- Temperature gauge
- Step 1: Buy a Good Home Waxing Kit
- Step 2: Make Sure Your Hair is the Right Length for Waxing
- Step 3: Check the Temperature of the Wax
- Step 4: Exfoliate the Area You Will Be Waxing
- Step 5: Apply Baby Powder Before Waxing
- Step 6: Use Proper Technique
- tep 7: Apply Baby or Vegetable Oil After Waxing
- Step 8: Moisturize
What you will need:
Home Waxing Kit
It should go without saying that in order to wax, you will need some wax. There are many different home waxing kits available with different specifications and selling for different prices. You will want to be sure to do the pertinent research and choose the one that is best for you.
Baby powder
Having baby powder, which absorbs moisture, is an important part of preparing for a waxing. Be sure to check the ingredients if your skin is sensitive to any chemicals that may be present.
Exfoliator
You can use a sponge, scrub, or anything that will help you remove dead skin cells. Exfoliation is a very important step in performing a successful wax at home.
This will be needed to remove excess wax after the process is finished. Baby oil has the added benefit of simultaneously acting as a moisturizer.
Temperature gauge
If you are going to use hard wax, you will want to test the temperature of the wax to be sure it isn’t going to burn your skin.

Step 1: Buy a Good Home Waxing Kit
Believe it or not, not all home waxing kits are the same. In a classic example of “you get what you pay for,” the cheapest kits will not get the job done. Let’s face it – waxing does not tickle. You are going to want to be sure that the waxing kit you purchase will allow you to get the job done in one go and not make you have to keep reapplying on the same spot. How do you know which waxing kit is best? You can start by doing research online and asking people you know who wax at home. However, the only real way to know which kit is best for you is to try them out at home. The easiest way to do this is to wax a patch of hair in an area that no one normally sees. While this may be costly at first (i.e. buying several home waxing kits to try out), it will save you money and a lot of headache in the long run.
Step 2: Make Sure Your Hair is the Right Length for Waxing
If you are going to wax, your hair should be between ¼ and ¾ of an inch long. If it is shorter than that, waxing will be unnecessary painful. If you have hair longer than that, waxing is going to be a long and messy process. One way to make sure that your hair is the right length for waxing is to measure it with measuring tape or a ruler. Another way is to simply look at it and use your judgment. If your hair is too short, consider an alternative method, such as using an epilator (or let it grow out a bit If it does not bother you). Should you have longer hair than what is recommended for waxing, then you may want to shave to get it at the right length for doing a wax job.
Step 3: Check the Temperature of the Wax
Unless you are using cold wax strips, you are going to want to take the extra time the check how hot the wax is before you apply it to your skin. Using wax that is too hot can be excruciatingly painful and leave unsightly burn marks on your skin. Use a thermometer and make sure the wax is between 125⁰ – 140⁰F. Too cool and the wax won’t work, too hot and it can do damage.
Step 4: Exfoliate the Area You Will Be Waxing
Exfoliating your skin is an excellent way to get rid of dead skin cells that may be blocking your pores and thereby prevent ingrown hairs. In order to do this, you are going to need an exfoliating scrub or sponge. Apply it to the desired area and rub in circular motions to get rid of dead skin and tease out any ingrown hairs.
Step 5: Apply Baby Powder Before Waxing
Baby powder isn’t just for babies. Commonly applied to the face in some countries such as Thailand to prevent sweating, baby powder absorbs moisture and is essential in helping the wax stick to the skin. Attempting to apply wax onto skin that is not dry may result in the wax slipping and the whole process not working.
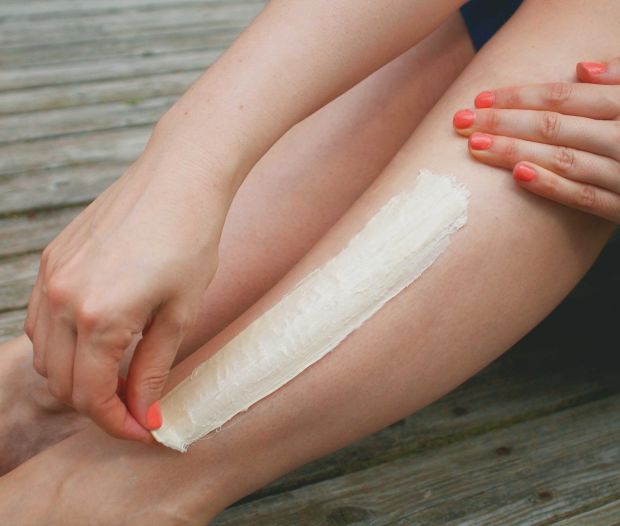
Step 6: Use Proper Technique
If you have never done waxing by yourself at home before, you may be thinking that waxing is simply a matter of putting the strip on the patch of skin to be waxed and ripping the hairs out. While this isn’t all that far from the truth, things aren’t quite as simple as that. In order to wax effectively, keep the skin taught and apply the wax in the same direction the hair is growing and then pull in the opposite direction.
tep 7: Apply Baby or Vegetable Oil After Waxing
In order to get rid of excess wax, apply some vegetable oil to the area after waxing. If you use baby oil, you will be able to skip the next step, as it has the added benefit of moisturizing the skin.
Step 8: Moisturize
By the end of the entire process, your skin is going to be dry. In order to have the best results, you will need to moisturize your skin. If you haven’t used baby oil to get rid of excess wax, you can apply lotion or another moisturizer. Moisturizing your skin after waxing is very important in that it will prevent your skin from drying out. Dry skin is the primary cause of having dead skin cells that cause ingrown hairs by blocking pores. This will also leave your skin feeling nice and give it an extra glow.
There you have it. In just eight very easy steps, you can bring the experience of getting a wax at the spa to your own home. If you have never given yourself a wax before, don’t worry. Just follow the eight steps given above and you will have no problems. Be sure that you make sure you are using the home waxing kit that is best for you. The only way to be sure is to try different products out – though you can narrow the field down by doing research over the Internet and talking to people who do waxing.
Leave a Reply